Posts

Showing posts with the label Unity

Tutorial 05

Image
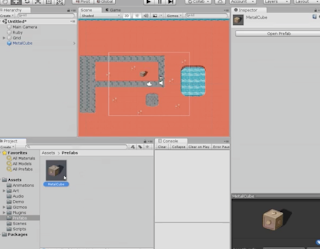
  This weeks Unity tutorial consisted of two parts. I found it much more straight forward to follow compared to last weeks tutorial which took me well over 3 hours. Luckily this one took me around an hour and a half to complete.  For the first part of the tutorial I added a package called Cinemachine - this is an addition to your game that automatically controls the games camera without the need for adding code to your game which is extremely helpful and saves a lot of time. Following on from that I also added boundaries to the camera movement to ensure that it doesn't show the user anything outside the map I have created. The second part of the tutorial was titled 'Visual Styling'. This consisted of adding particle like objects to the game which can mimic smoke, sparks and even fire. As the weeks go on I am getting more and more used to having no video tutorial to follow along to, although if there was a video I feel I could complete each tutorial much faster. 

Tutorial 04

Image
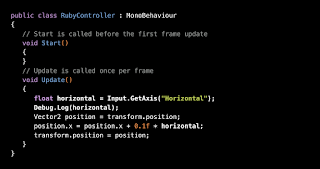
This weeks unity tutorial really tested me! I was really struggling with it and it took me so long to complete. There was so many different aspects that had to be completed, it felt never ending.  The first part of the tutorial consisted of learning about 'Sprite Animations' - these additions to the game help your player move more smoothly, taking away the static like movements that were previously in the game. I also added sprite animations the my enemies in the game which gave the game a much more professional feel. To input sprite animations I worked mainly on the unity interface but it also required coding. I struggled with the coding aspect of it which resulted in me spending a lot more time on this then needed. The second part of the tutorial   consisted of creating a script to the game using code. 

Tutorial 03

Image
This weeks Unity tutorials consisted of adding damageable objects and enemies to a game and also having 'lives' that decrease each time your character runs into a dangerous obstacle / enemy. The first part of the tutorial focused on coding the health stat into the game. It began with five lives which I then had to code to decrease when I lost a life and then code it to increase again when the character gained a life by collecting one in gameplay.  For the second part of the tutorial this week I had to actually make the damageable objects and enemies and incorporate them into the game. I decided to add in a grenade looking object that I found in the Unity assets. I then had to link the coding so that when the character came into contact with the object that the health stat would decrease by one life. Overall this was an informative unity tutorial and thankfully I didn't meet too many problems along the way.

Tutorial 02

Image
This week we had two Unity tutorials to complete. Thankfully they were shorter than last weeks, however I am still struggling with the fact that this time around there is no video tutorials to follow along to. Me personally I am a visual learner so just reading instructions and not actually being shown what to do is not ideal. For the first tutorial we learned to create a folder to place all of your game objects into so that when an you apply a setting to an object in the folder it will apply to all of them which is actually very useful and will save up a lot of time. I discovered early on that by accident I was adding objects that I didn't mean to add into the folders but I realised I was doing it and fixed the issue.  The second tutorial consisted of Box Colliders and Rigidbodys. These are also both very useful as they give the game a more lifelike feel.  I will be back next week with more Unity tutorials. Thanks for reading - Leslie

Tutorial 01

Image
  More Unity tutorials! I wish I could say I was happy about it but Unity isn't getting any easier for me unfortunately. This week we started on a new set of tutorials. We had an option to choose the difficulty level we wanted to work with, I feel like my skill level isn't where it needs to be in order to attempt a more difficult tutorial so I chose to do '2D Game Dev' From the outset I began experiencing problems as Unity kept crashing on my laptop when I opened it which forced me to uninstall and download it again. This eventually resolved my problem. I was surprised to see when I opened the tutorial that there was no video instruction to go with it like there was in the previous tutorials I completed.  To begin with I didn't think it would hinder me as much as it ended up doing. I found it really difficult to follow along with the instructions when there wasn't a visual aid to back it up, this lead to the tasks being much more time consuming then they should ...

Unity Tutorial 03

Image
Unity Prototype 2   For this weeks Unity tutorials they took way longer than I intended on spending on them. I kept making minor mistakes in the coding which cost me a lot of time as I couldn't find what it was that was stopping the game from working the way it is meant to. In the first tutorial I learned how to move the player from left to right like last time but the difference this time round was that I stopped the player from going off the edge of the screen by adding an 'if-statement'. This piece of code says that if that player is gone too far to the left or to the right that it will automatically stop.  The next two tutorials I completed I found much harder than the first. In my head I am still trying to make sense of the Unity interface and the basics of making a game. As the tutorials get progressively harder I am finding myself finding it more and more difficult to complete them by the suggested time.  However I know how important it is to complete these tutoria...

Unity Tutorial 02

Image
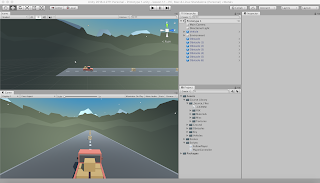
  Unity screenshot (my image)   Firstly for this weeks Unity tutorial we had to finish our car game that we started last week. When I first started the Unity tutorial I never would have expected that I could make the basics of a game but with the tutorials I found them quite easy to understand. We ended up with a working basic game. I got the car to move around the obstacles and travel at a certain speed. For the second Unity tutorial we were thrown into the deep end as we had to fix problems in the game by applying what we have learned already in the previous tutorial. I found this very difficult at first but I used the first tutorial as a reference to look back on. I was able to move the camera angle, make the plane go forward and also make the plane respond to my keys. I am still getting used to the fact that the slightest mistake in the code can make the game not work at all. It is easy to get very frustrated at yourself and lose patience but hopefully I will learn in time...

Unity tutorial 01

Image
  (screenshot of unity interface - by me) I have just completed my first set on Unity tutorials which surprisingly enough, I enjoyed! At the beginning it was quite intimidating opening up the Unity Hub as I have never used it or seen it before but the tutorials were very helpful. In the tutorials they explain how important it is to watch what they are doing first and then do it for yourself after. At the beginning I had to stop myself from going off and doing the work as he was doing it but when I watched the tutorial in full first I found I understood it a lot more.   To start off with I learned the basics like adding a folder to the programme and how to add a car and obstacle but as the tutorials went on I learned how to move camera angles, change the mass of an object and even get the car to move which was very cool.I didn't realise how much work goes into the basic movements but I suppose the more I learn the more things will come naturally to me. The coding side of t...