Posts

Technical Difficulties

The past two weeks I am having a lot of trouble with my laptop. For some reason nothing is saving and when I restart my laptop I find some of the work I have completed is gone, because of this I have purchased a hard drive to which I am going to upload my blog posts as I have had to re-do some that I previously already done. I am getting my laptop fixed this week so hopefully the problem will be solved!

Tutorial 05

Image
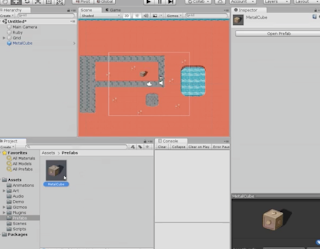
  This weeks Unity tutorial consisted of two parts. I found it much more straight forward to follow compared to last weeks tutorial which took me well over 3 hours. Luckily this one took me around an hour and a half to complete.  For the first part of the tutorial I added a package called Cinemachine - this is an addition to your game that automatically controls the games camera without the need for adding code to your game which is extremely helpful and saves a lot of time. Following on from that I also added boundaries to the camera movement to ensure that it doesn't show the user anything outside the map I have created. The second part of the tutorial was titled 'Visual Styling'. This consisted of adding particle like objects to the game which can mimic smoke, sparks and even fire. As the weeks go on I am getting more and more used to having no video tutorial to follow along to, although if there was a video I feel I could complete each tutorial much faster. 

Tutorial 04

Image
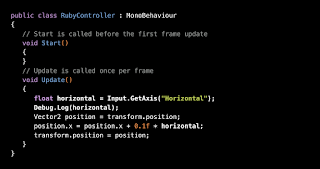
This weeks unity tutorial really tested me! I was really struggling with it and it took me so long to complete. There was so many different aspects that had to be completed, it felt never ending.  The first part of the tutorial consisted of learning about 'Sprite Animations' - these additions to the game help your player move more smoothly, taking away the static like movements that were previously in the game. I also added sprite animations the my enemies in the game which gave the game a much more professional feel. To input sprite animations I worked mainly on the unity interface but it also required coding. I struggled with the coding aspect of it which resulted in me spending a lot more time on this then needed. The second part of the tutorial   consisted of creating a script to the game using code. 

Tutorial 03

Image
This weeks Unity tutorials consisted of adding damageable objects and enemies to a game and also having 'lives' that decrease each time your character runs into a dangerous obstacle / enemy. The first part of the tutorial focused on coding the health stat into the game. It began with five lives which I then had to code to decrease when I lost a life and then code it to increase again when the character gained a life by collecting one in gameplay.  For the second part of the tutorial this week I had to actually make the damageable objects and enemies and incorporate them into the game. I decided to add in a grenade looking object that I found in the Unity assets. I then had to link the coding so that when the character came into contact with the object that the health stat would decrease by one life. Overall this was an informative unity tutorial and thankfully I didn't meet too many problems along the way.

Reading 03

Image
Screenshot from paper My topic for the readings is 'Commonly Used Challenges in Games' . As I said before in a previous blog post I felt there would be a lot of material on this subject for me to research. To be honest I really struggle with academic writing and reading, it is not something I enjoy so it is difficult for me to focus on a particular paper.  For my reading this week I took at a paper by  Jukka Vahlo (Ph.D.) and  Veli-Matti Karhulahti (Ph.D.). It is titled   Challenge types in gaming validation of video game challenge inventory (CHA).  I have linked the paper here . Overall it was very informative and provided an extremely in-depth look into the different challenges used in games and why, we as a a player, prefer certain aspects of different challenges.

Tutorial 02

Image
This week we had two Unity tutorials to complete. Thankfully they were shorter than last weeks, however I am still struggling with the fact that this time around there is no video tutorials to follow along to. Me personally I am a visual learner so just reading instructions and not actually being shown what to do is not ideal. For the first tutorial we learned to create a folder to place all of your game objects into so that when an you apply a setting to an object in the folder it will apply to all of them which is actually very useful and will save up a lot of time. I discovered early on that by accident I was adding objects that I didn't mean to add into the folders but I realised I was doing it and fixed the issue.  The second tutorial consisted of Box Colliders and Rigidbodys. These are also both very useful as they give the game a more lifelike feel.  I will be back next week with more Unity tutorials. Thanks for reading - Leslie

Tutorial 01

Image
  More Unity tutorials! I wish I could say I was happy about it but Unity isn't getting any easier for me unfortunately. This week we started on a new set of tutorials. We had an option to choose the difficulty level we wanted to work with, I feel like my skill level isn't where it needs to be in order to attempt a more difficult tutorial so I chose to do '2D Game Dev' From the outset I began experiencing problems as Unity kept crashing on my laptop when I opened it which forced me to uninstall and download it again. This eventually resolved my problem. I was surprised to see when I opened the tutorial that there was no video instruction to go with it like there was in the previous tutorials I completed.  To begin with I didn't think it would hinder me as much as it ended up doing. I found it really difficult to follow along with the instructions when there wasn't a visual aid to back it up, this lead to the tasks being much more time consuming then they should ...

Planning

Image
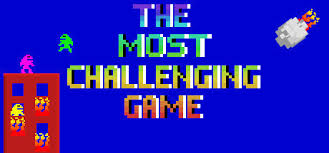
  (https://store.steampowered.com/app/762100/The_Most_Challenging_Game/) Welcome back to my blog for semester two! This week was all about planning for what we will be doing for the rest of the semester. To begin with I chose the topic I am going to be writing about for the document we are all writing together on Game Design. There were a few sections I had my eye on but after my most desired heading was already chosen I had to resort to picking an alternative. I settled on 'C ommonly Used Challenges' in the gaming world, I picked this for a few reasons, the main one being that I feel there will be a lot of information available for me when researching this topic since it is very broad. Also because it covers all different genres of games I have an opportunity to compare and analyse each one against each other which makes for more content.  A few key words I have chosen to use to research this topic are: (1) Challenge,   (2) Player Preferences,  (3) Motivation, ...

Review Week Comments and Feedback

This week we had to review our comments and feedback we have been completing so far this semester. I find reading the comments on my blog posts extremely useful as it is great to see my work from someone else's point of view. Each week when I read the comments I gain something from reading them, whether it is something I need to work on or maybe an extension to an idea I had, my peers in the class have been so helpful. At first it is strange to see someone suggesting hoe your work could improve or could be changed but as time goes on and I myself am also commenting on others people work you realise that we are all just trying to help each other and there is no malice intended.  I am finding as we continue on in this module I am providing, hopefully, more helpful feedback as I am becoming more confident in my wording and approach to leaving it. I love reading other peoples blogs and I find it great that I learn from them. It's amazing to see how creative and talented the people ...

Alpha

Image
This week has by far been the most difficult in working with Unity. I set out to have a big chunk of my game complete and to a playable stage but unfortunately there was a lot of walls I hit along the way which took up a lot of time. The main aim I had was to add clickable items that show clues which led to the key. I began by looking up tutorials on Unity,  this  is the first one I followed but for some reason it didn't work for me so I had to spend a while watching several Youtube videos.  To be honest at the beginning of this process I was excited to make my own game but as time goes on it is getting increasingly difficult and more frustrating to work on which is resulting in me enjoying the process less and less.  After spending over 3 and a half hours working on my game I achieved very little in comparison to what I set out to do. I managed to set out all of my objects around the room that I want to be used in the game. I also added in a safe in which the key wi...

Week 9 - Reading and Writing

Image
This week is all about reflecting which is a nice switch up. I was excited to see for our tasks this week we had to review everything we have learned so far which jogs the memory and makes you realise how far I have come within only a couple of weeks! Focusing this blog post on the previous readings I have completed I briefly read over what I have written in the past few weeks. When the readings were first introduced I was quite intimidated by them as academic writing was completely alien to me. The CDM website, however, held great tips for tackling academic writing and I used the tips and examples for reference throughout each writing. The first reading I completed was an in-depth look at  Game Design   . I gave myself around an hour browsing the readings and highlights the parts I found the most important. After spending a while reading I found it hard to understand and take all of the information in, I did however find that reading the conclusion section of each readin...

First Playable

Image
This week I continued to develop my game. My main aim was to position the player in the middle of the room and to be able to rotate around 360 degrees. To achieve this I looked back on a previous Unity tutorial I had completed.  In terms of operating Unity I found this week the hardest as I encountered a lot of problems that took me a long time to solve. As I was trying to link my code to my game an error message kept popping up, this lead to me trying for over an hour and a half to fix the problem. I began to become really frustrated as  I had planned to get a lot more completed than I actually did.  When I first began completing Unity tutorials I was enjoying it but as time goes on I am finding it harder and harder and I feel I am falling behind.  What I achieved this week:  Positioned camera in centre of room with user being able to rotate around Simplified the room and took out the assets that I did not need which made it look a lot neater. Began the process...

Game Fun

Image
Games can be described by the 3 components Mechanics, Dynamics, and Aesthetics (MDA) or otherwise stated as rules – system – “fun” . The three reading selections this week and the synopsis below all address the term “fun” in relation to game design. There are eight types of Fun outlined by the MDA. These eight are both a source of reference and player experience that blend together in many ways, and essentially what makes a game engaging and enjoyable. Figure 1: Eight kinds of Fun Both Oxford and Merrian dictionaries define Fun as an enjoyment, delight but within the context of a game it refers to a form of pleasurable entertainment. MDA papers define the '8 kinds of fun' sensation, fantasy, narrative, challenge, fellowship, discovery, expression, and submission, remain a source of reference and possibly the most popular list of player interactions combining in various forms to attract each player to a particular game. Nicole Lazzaro presents four types of fun that are involve...

Prototype

Image
  This week we had to make a prototype for our game. At the beginning of tackling this assignment I found it difficult as I wasn't sure how to begin or where to start. The first approach I took was to make a basic room from scratch using the skills I have learned from using the Unity tutorials, a few minutes into doing this however I realised how much more beneficial it would be to use Unity assets from the website.  I went online and searched for a medieval room asset which I could use as my template, after searching for an hour or so I found the one pictured above and found it fitted my theme perfectly. I downloaded these assets and placed them into my project. Of course I was not just going to use it as is, I removed some elements and added in pictures and chairs etc from other assets I have found. I had to add a camera to these assets and begin to picture where my player would be placed in the game.   I really love how it looks but as I progress in making my...

Game Decisions

Image
  Video In order for the player to be optimally engaged, challenges should be presented at a level equivalent or slightly higher than their current skill. Not too easy, not too hard”( Gigity McD ) The word 'flow state' was coined by Csikszentmihalyi (1975) also known as being “in the zone” This is when the player is fully engaged in the game experience. Csikszentmihalyi put a lot of work into observing and analyzing various groups of people. This theory is focused on the idea of how people should balance their skills and the demands of particular tasks. An example of Flow would be a challenge in a game that interests the player such as a puzzle or a boss battle meant to keep the player interested and not get bored. Csikszentmihalyi also states that flow is related to an ideal psychological condition when a person engages in a challenge-skill activity, often resulting in concentration and a focused emphasis on a task. A practical technique for improving Flow is to look at what ...

Game Design Document

Image
I started my game design document earlier on this week. Unfortunately when I clicked on my link the make sure it worked I found that my work wasn't there. As a result I had to start again and rush to add information to my document. However I will add to and improve this document over the next few weeks as I develop my game.  Here  is a link to my document.   My Document

Games GDD

Image
  ( Source:   Youtube ) What is the GDD for? A Game Design Document (GDD) is a blueprint for the design and development of a game. The GDD is a way of being creative and documenting the approach to the development of the game.  Gonzale  (2016) states that “ the important thing is to have something that describes your game project (or any other project for that matter) before jumping into production.(  Gamasutra  ) It should help to plan out your game. Though it is recommended that the GDD should be short it needs to be detailed enough so as game developers and artists can coordinate the development of the game independently whilst still keeping to the design. The GDD is a blueprint for how the game is going to be designed and built, similar to a mind map. In conclusion, the game design document is vital to making a game and it is important to have in order to describe your game project. How do we make one? There are a variety of tools that could be used to ...